1. Introduction
1.1 OGC Standards
1.1.1 Web Mapping Service
1.1.2 Web Feature Service
1.1.3 Web Coverage Service
1.1.4 Web Processing Service
1.2 CAAML
1.3 INSPIRE
2. Standards in action
2.1 Prepare data and toolkit
2.1.1 Manage the data
2.1.2 Design the CAAML schema
2.2 Build CAAML with GeoAvalanche
3. Main Chapter
Push the configuration to GeoAvalanche
Export the CAAML application schema configuration
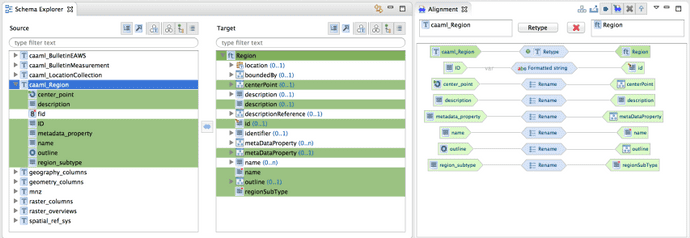
At the end of the mapping session we should have completed all the mapping properties for our Region target type and the Hale window should look like:
Assuming we have our instance of GeoAvalanche running locally at http://localhost:8080/geoavalanche let's see how simple is to get CAAML features published from that server:
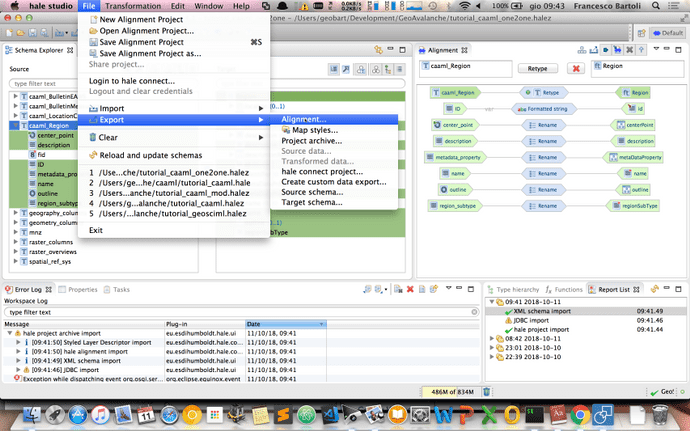
From the File menu select Export and then click on Alignment:
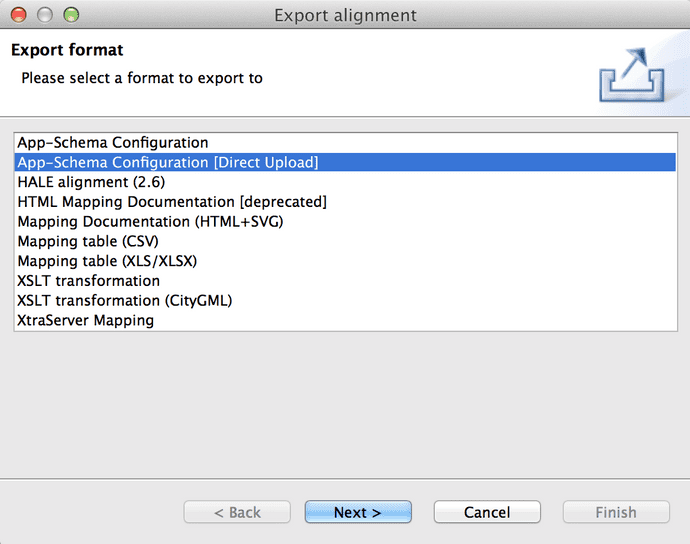
Select App-Schema Configuration [Direct Upload] then click Next
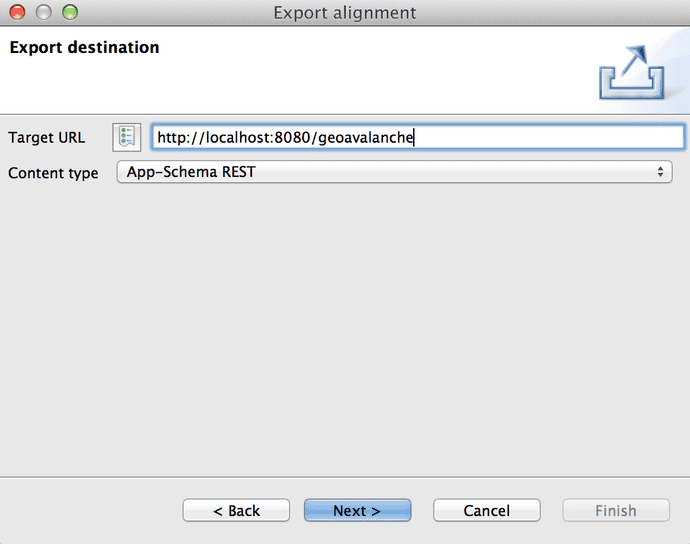
Fill the Target URL with the base url for your server http://localhost:8080/geoavalanche and then click Next
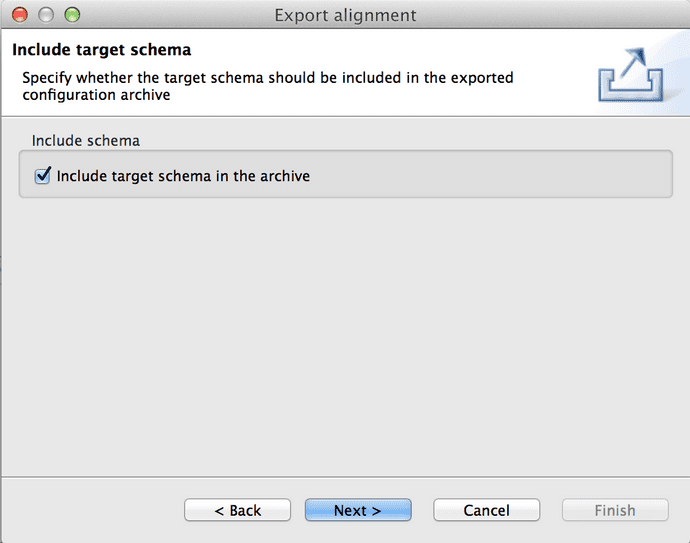
Tick the option to include your custom target schema until it's not published online and then click Next
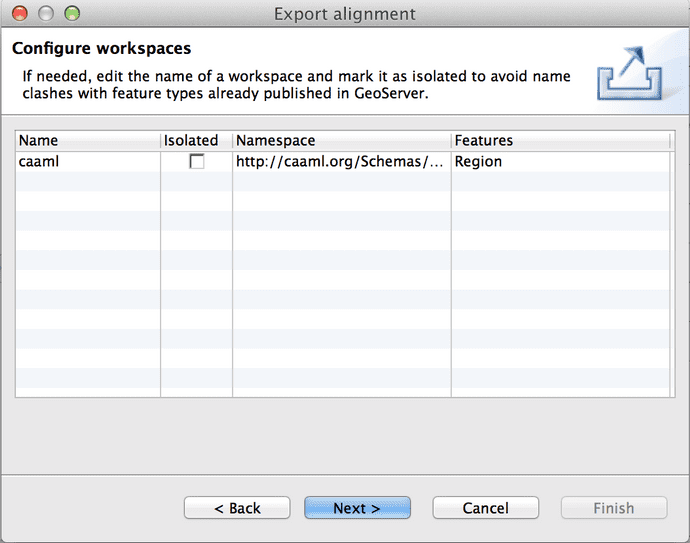
Double check your workspace configuration and then click Next
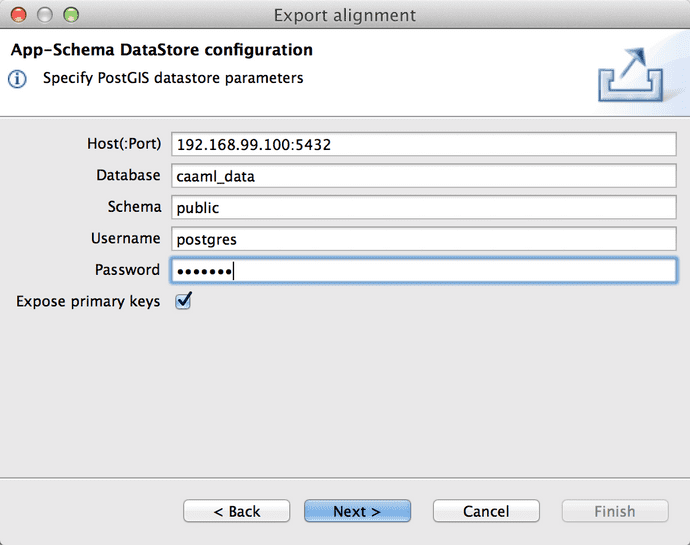
Fill the values for the PostGIS datastore connection parameters and then click Next
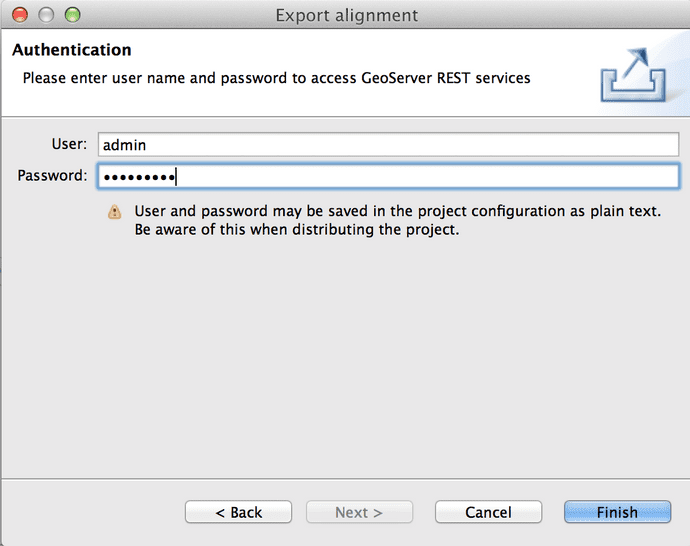
Fill the values for the administration of GeoAvalanche server. By default they are set up to admin/geoserver
Then click Finish and wait for the completion of the upload. Once finished you can close Hale and play with the Region features
Visit the Layer Preview page of GeoAvalanche and you should see a new layer in the list which is named caaml:Region:
We have just successfully created a new app-schema datastore in GeoAvalanche. Let's see now how we can query our regions.